04/06/2009
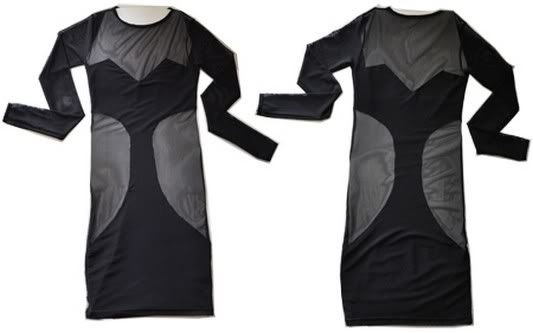
DIY Project = The Mesh Dress

YOU’LL NEED
- American Apparel Mesh Dress
- 2 yards of black cotton jersey (anything with stretch will work)
- Light but durable paper for pattern-making (mine was 17″ x 31″)
- Scissors, needle, and black thread
- Demi-cup bra
1. TAKE SHAPE Halve your sheet of paper and start drawing the top half of the pattern. Here I used a ruler to create straight lines. As a general guide, take a strapless demi-cup bra to ensure that your pattern gives you enough coverage. Continue drawing until you have completed the pattern. TIP Place the completed pattern over your body and dress to ensure it will have enough top and bottom coverage.
2. SNIP SNIP Cut the fabric with your pattern. Be liberal with pins: you need to make laser edge cuts. TIP Highly recommend using sewing shears unless you plan to finish the raw edge
3. STITCH BY STICH Pin the fabric onto the dress turned inside-out. Sew very delicately–mesh cannot take super tight stitches. Sew in sections; this way if you ‘mess up’ you won’t have to take the whole seam out. Try it on after the bust area has been sewed together. If all looks well, continue sewing. TIP Make sure you leave about 1/2 inch on the sides to prevent pulling once the dress is on.
4. PUT YOUR BACK INTO IT Use the same pattern to create a piece for the back. TIP Place against the front to ensure the sides meet, so your profile will have a continuous line.
20:57 Publié dans DIY It-Things | Lien permanent | Commentaires (0)


Les commentaires sont fermés.